Technical Tuesday: How To Check And Adjust Your Headset
by Mike Levy
For today's Technical Tuesday we're going to show you how to check and properly adjust your bike's headset. Inside you'll find both step by step instructions and a great How-To video running you through the process.
Read on...
Read on...
An ill adjusted headset can be detrimental to your ride, not to mention possibly damaging the headset itself or even your frame. Too loose and you'll feel a constant knocking sensation through your bars and quickly begin to damage parts. Too tight and your bars won't turn freely enough and you'll go through headset bearings like Al Gore through global warming excuses. Adjusting your bike's headset is quick and easy enough to do that there should be no reason for it to ever be ridden while too lose or too tight. Below you'll find step by step instructions on how to properly make these adjustments.
Step By Step Headset Adjustment Instructions
Tools needed: Folding allen key set (or separate allen keys depending on sizes needed)
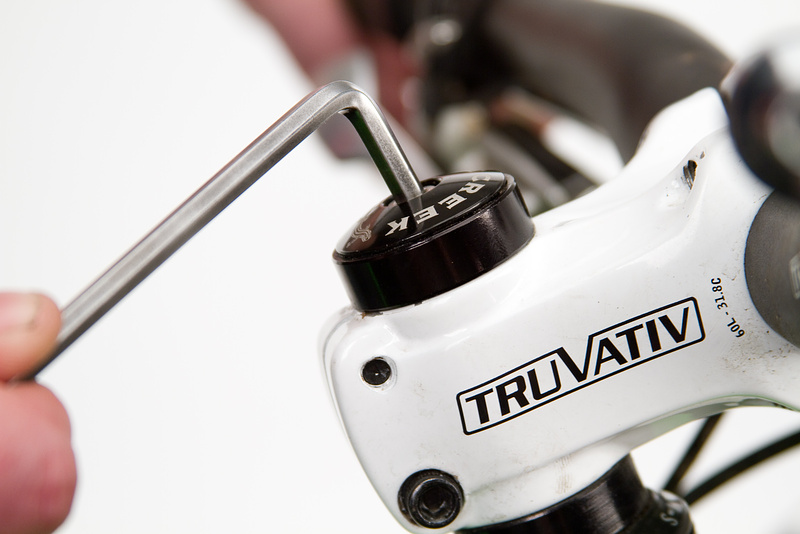
Before we start using tools, let's make sure you know the function of the parts we'll be adjusting. On top of your stem you'll find the top cap with the headset preload bolt at its center. The function of the top cap and bolt is to apply the correct amount of preload to the headset bearings. If it's too tight your bars will not turn freely, too loose and your headset will have play and knock back and forth. This bolt usually fits a 5 mm allen key, although it can be a 4 mm for certain models.
 |
| These are your stem steerer clamp bolts |
You'll also need to loosen and retighten your stem's steerer tube clamp bolts as you work through this task. There are a few different ways that stems can clamp onto the steerer tube, although the most common place to find these bolts is at the rear of the stem. Steerer tube clamp bolts can come in 4 mm, 5 mm, and 6 mm varieties. If you're unsure if you have the right tools, or aren't confident in your ability to do this, be sure to take your bike to your local shop to have the work done correctly.
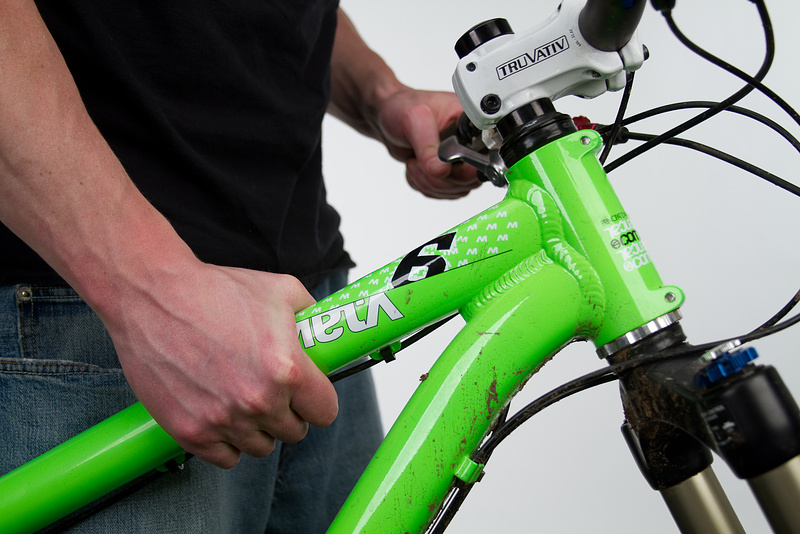
1. Let's start be figuring out if your headset is too tight or too loose. To do this, place one hand over where your fork crown and lower headset cup meet and use your other hand to hold your front brake on. Now gently rock the bike front to back. If your headset is loose you'll feel a knocking through the hand that you're holding over the lower headset cup. If you have a dirt jump bike without a front brake, you can turn the front wheel 90 degrees and check for the same knocking with your hand. To check if your headset is too tight lift just the front of your bike off the ground an inch or two by holding onto the top tube. With the front tire off the ground check to be sure that the wheel flops from side to side without your hands on the handlebar. A headset that's too tight will hold the bike's steering in place or slow it down as it flops back and forth.
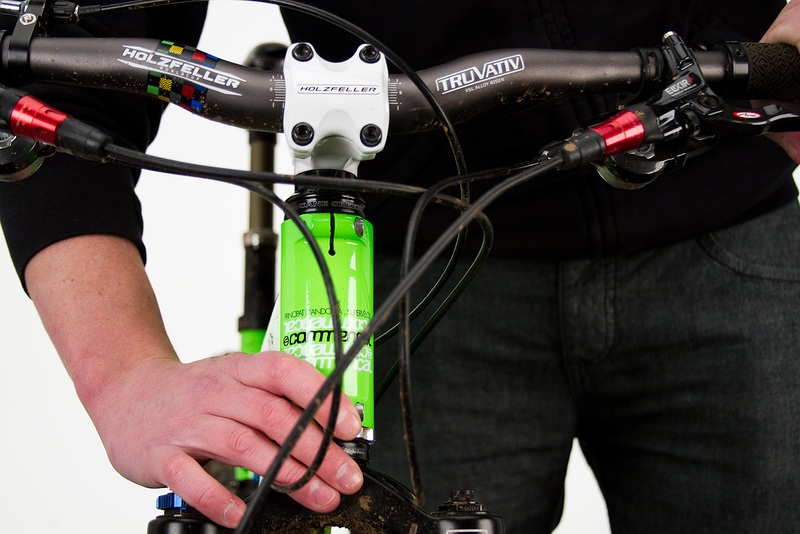 |
| Place your hand over the fork crown and lower headset cup to feel for any slop from a loose headset |
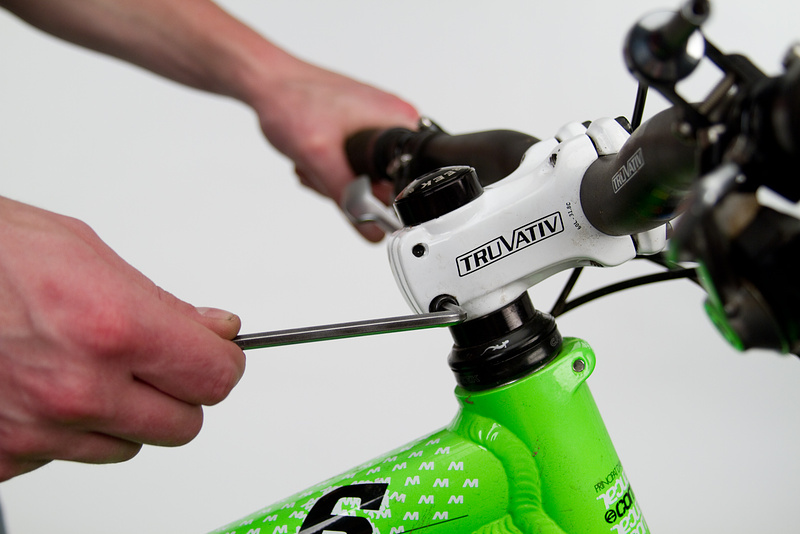
2. Once you've figured out whether it's either loose or too tight, you'll have to fix it! We'll start by adjusting a loose headset. With the bike on the ground, loosen the stem clamp bolts a few turns each (if your bike has a double crown fork you'll need to also loosen all of the upper crown bolts) Once the stem is loose on the steerer tube, turn the top cap bolt clockwise a half turn at a time, stopping to recheck if it is still loose by placing your hand over the lower headset cup and checking for knocking as you rock the bike back and forth. Once any free play is gone, lift the front end off the ground a few inches and check to be sure the wheel still turns freely.
 |
| Adjusting the headset's bearing tension to either take up slop or to loosen it so it will turn free |
3. If you've discovered that your headset is too tight, you'll need to loosen off the top cap bolt that preloads the headset bearings. Start by loosening your stem clamp bolts a few turns. Now turn the top cap bolt counter clockwise a half turn at a time. After each time be sure to check if you've loosened off too much by putting your hand over the crown and lower headset cup and rocking the bike back and forth. If you feel knocking you'll have to add bearing preload by turning the top cap bolt clockwise until it goes away.
 |
| Hold the front wheel off the ground and check to be sure the steering turns freely |
4. Once you are positive that you've correctly adjusted your headset, you'll need to realign the stem before retightening the clamp bolts. The easiest way to do this is to straddle the bike's top tube and sight from above to line the center of the stem up to the centerline of the tire. If there are any straight lines on the ground, even the edge of a floor mat, you can use it to help you align the tire and stem. When the stem is straight you can retighten it to the manufacturer's specifications. If you're not positive that you've done all the above steps correctly you should take the bike to your local shop for them to check it over before you hit the trails.
 |
| Align the stem with the centerline of the tire |
 What next